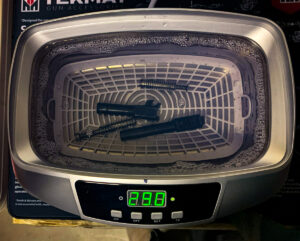
To clean my firearms thoroughly but without spending a fortune I am using a Harbor Freight Ultrasonic cleaner ($75) along with Simple Green Pro (the purple one). This can be an effective method for cleaning firearm parts. Here’s how you can do it:
- Disassemble the Firearm: Before cleaning, disassemble the firearm as much as possible. Remove all removable parts such as the bolt, slide, trigger assembly, and magazine if applicable. This allows for a more thorough cleaning.
- Select the Right Ultrasonic Cleaner: Ensure you have an appropriate ultrasonic cleaner for the size of the firearm parts you intend to clean. Follow the manufacturer’s instructions for operating the ultrasonic cleaner.
- Dilute Simple Green Pro: Simple Green Pro is a powerful cleaner, so it’s essential to dilute it properly. Mix the Simple Green Pro with water according to the manufacturer’s instructions. The recommended dilution ratio for cleaning firearms is typically around 10-20%. Make sure to use the Purple Simple Green Pro, the regular Green version is very corrosive, especially on aluminum parts.
- Pre-Cleaning: Before using the ultrasonic cleaner, it’s advisable to pre-clean the firearm parts manually. Remove any loose debris, carbon buildup, or excess oil using brushes, rags, or other cleaning tools.
- Fill the Ultrasonic Cleaner: Fill the ultrasonic cleaner’s tank with the diluted Simple Green Pro solution. Ensure the solution covers the firearm parts completely but avoid overfilling the tank.
- Place Parts in the Ultrasonic Cleaner: Place the disassembled firearm parts into the ultrasonic cleaner’s basket or tray. Make sure the parts are fully submerged in the cleaning solution but not overcrowded. It’s important to leave enough space between parts to allow for proper cleaning action.
- Run the Ultrasonic Cleaner: Turn on the ultrasonic cleaner and set it to run for the recommended time according to the manufacturer’s instructions. The cleaning process typically lasts between 10 and 30 minutes, depending on the level of soiling and the power of the cleaner.
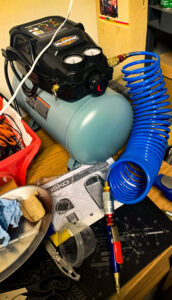
- Rinse and Dry: After the ultrasonic cleaning cycle is complete, remove the firearm parts from the cleaner. Rinse them thoroughly with clean water to remove any remaining cleaning solution residue. Dry the parts completely using compressed air or clean, lint-free cloths. I again use a cheaper Harbor Freight 3 Gallon Compressor.
- Inspect and Lubricate: Inspect the cleaned firearm parts for any remaining debris or signs of corrosion. Apply lubricant to moving parts and contact surfaces as recommended by the firearm manufacturer to prevent rust and ensure smooth operation.
- Reassemble and Function Check: Reassemble your firearm following the manufacturer’s instructions. Perform a function check to ensure everything is working correctly.
- Clean the Ultrasonic Cleaner: After each use, clean the ultrasonic cleaner according to the manufacturer’s instructions to remove any residue or buildup from the cleaning process.
Using an ultrasonic cleaner with Simple Green Pro can be a cost-effective and efficient way to clean firearm parts, but always prioritize safety and follow the manufacturer’s guidelines for both the cleaner and your firearms.
– English Bob